
Tim Jones
Tuesday, December 21, 2021
Talos - The Kubernetes Operating System
Introduction
I’ve had a home lab for playing with servers for going on 15 years. It started in University, as a tired old desktop with as many hard drives as I could scrounge up and keep alive, all jerry-rigged into a then-cutting-edge LVM2 file server, as much memory as we could afford to host game servers (one at a time or the poor thing would overheat), and IPCop so we could all share the single internet connection we had. It was a frankensteinian beast, but it served me well and lit the match to the furnace of my career.
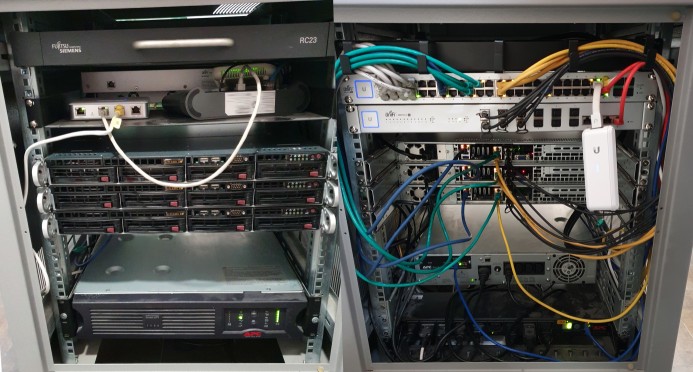
Fast-forward to the present, and I’ve a very forgiving wife who has accepted that I will always have the mistress that is my home lab, now resplendent in her 12U rack, with 10G networking of Ubiquity, battery back-up and power management by APC, and 3 XeonD based servers from SuperMicro. Some of which was even bought brand-new, but most still coming in second-hand. The time has come to give her a make-over, and I’ve decided to go all-in on Kubernetes this time around.
So, what is Talos?
![]() Talos from
SideroLabs is a Linux distribution built from the
ground-up for Kubernetes. What is so great about that? Well, most Kubernetes
deployments run on top of existing Linux distributions, such as Ubuntu or Amazon
Linux, and in doing so inherit all the issues of the underlaying distribution and
the bundled software.
Talos from
SideroLabs is a Linux distribution built from the
ground-up for Kubernetes. What is so great about that? Well, most Kubernetes
deployments run on top of existing Linux distributions, such as Ubuntu or Amazon
Linux, and in doing so inherit all the issues of the underlaying distribution and
the bundled software.
Talos is the reverse. When I said it was built from the ground-up I mean it has a Linux kernel (compiled with KSPP config), grub, containerd and runc, and a few Talos-built services to manage the host itself. It brings its own init, so no SystemD/sysvinit/upstart, machined to manage the machine itself and replaces NetworkManager/systemd-networkd/netctl and deals with local storage too. There is no shell with Talos, so no need for SSH either, instead Talos is managed by a robust and secure gRPC API with mutual TLS, managed bu apid and trustd respectively. It runs from a squashfs image so is immutable and ephemeral, it really is the absolute bare-minimalist distribution required to get a Kubernetes platform running in a reliable and secure manner.
With all that out of the way, lets get started on the fun stuff!
Installing Talos
Talos supports installations on pretty much anything, Cloud platforms like AWS, DigitalOcean, and Hetzner, including bare metal platform Equinox Metal, to local installs right on top of Docker or virtualised in VirtualBox or QEMU.
Since I want to use my physical servers, this guide is going to stick to the bare metal methods. The same team that created Talos have also created Sidero Metal to manage Talos Kubernetes cluster on bare metal platforms which I’ll cover at a later date, along with a highly-available control plane and customized network configuration. This first cluster will be a simple single control plane node with two worker nodes, and the networking will be handled by flannel which comes built-in as standard with Talos.
Get Set Up
First things first, I need the talosctl tool to manage a Talos cluster, and to
make it executable. For a simple boot process to get the cluster up-and-running,
I’m just going to download the ISO and boot directly from that.
$ curl -Lo ~/.local/bin/talosctl https://github.com/talos-systems/talos/releases/latest/download/talosctl-linux-amd64
  % Total    % Received % Xferd  Average Speed   Time    Time     Time  Current
                                 Dload  Upload   Total   Spent    Left  Speed
100   151  100   151    0     0    537      0 --:--:-- --:--:-- --:--:--   537
100   659  100   659    0     0   1415      0 --:--:-- --:--:-- --:--:--  1415
100 56.1M  100 56.1M    0     0  20.7M      0  0:00:02  0:00:02 --:--:-- 33.5M

$ chmod +x ~/.local/bin/talosctl

$ curl -Lo ~/Downloads/talos-amd64.iso https://github.com/talos-systems/talos/releases/latest/download/talos-amd64.iso
  % Total    % Received % Xferd  Average Speed   Time    Time     Time  Current
                                 Dload  Upload   Total   Spent    Left  Speed
100   146  100   146    0     0   1254      0 --:--:-- --:--:-- --:--:--  1258
100   654  100   654    0     0   4375      0 --:--:-- --:--:-- --:--:--  4375
100 72.7M  100 72.7M    0     0  30.6M      0  0:00:02  0:00:02 --:--:-- 35.0M
Next, generate the configuration needed for the Talos Kubernetes cluster, giving the cluster a name and API endpoint. In this case, I know the control plane node has a fixed IP given as a static lease from the DHCP server. You could just as easily use the host name if you internal DNS supports it.
$ export TALOS_CONTROL_PLANE="192.168.10.101"

$ talosctl gen config home-lab-talos-cluster https://${TALOS_CONTROL_PLANE}:6443
generating PKI and tokens
created /home/tim/projects/home-lab-talos/controlplane.yaml
created /home/tim/projects/home-lab-talos/worker.yaml
created /home/tim/projects/home-lab-talos/talosconfig

$ talosctl --talosconfig talosconfig config endpoint ${TALOS_CONTROL_PLANE}
Now I am ready to boot the servers via the ISO downloaded earlier.
Bootstrapping the Control Plane
When booting an unconfigured environment, Talos will boot into a minimal ’live'
system waiting for configuration. This can be provided by having a HTTP endpoint
serving the configuration, putting it in user-data, or using talosctl itself to
push the configuration to the machine. I am using the latter method in this case.
During the boot sequence, there is a message to signal that Talos is waiting for configuration, which should look similar to the following:
[  123.278059] [talos] task loadConfig (1/1): this machine is reachable at:
[  123.446031] [talos] task loadConfig (1/1):  192.168.10.101
[  123.999253] [talos] task loadConfig (1/1): server certificate fingerprint:
[  124.170420] [talos] task loadConfig (1/1):  dQJHkqoTA1/RP/YXS4QgJt/Pr6K7sR4JKQcb71R6cv4=
[  124.370537] [talos] task loadConfig (1/1):
[  124.476888] [talos] task loadConfig (1/1): upload configuration using talosctl:
[  124.658006] [talos] task loadConfig (1/1):  talosctl apply-config --insecure --nodes 192.168.10.101 --file <config.yaml>
[  124.930462] [talos] task loadConfig (1/1): or apply configuration using talosctl interactive installer:
[  125.167492] [talos] task loadConfig (1/1):  talosctl apply-config --insecure --nodes 192.168.10.101 --interactive
[  125.425906] [talos] task loadConfig (1/1): optionally with node fingerprint check:
[  122.613633] [talos] task loadConfig (1/1):  talosctl apply-config --insecure --nodes 192.168.10.101 --cert-fingerprint 'dQJHkqoTA1/RP/YXS4QgJt/Pr6K7sR4JKQcb71R6cv4=' --file <config.yaml>
This is the cue to apply the Talos configuration, unfortunately it can scroll by pretty quick as more kernel message are output in the wait loop. In any case, I can apply the control plane configuration to the node a couple of minutes after booting.
$ talosctl --nodes ${TALOS_CONTROL_PLANE} apply-config --insecure --file controlplane.yaml
That starts the install process on the Talos control plane node, pulling the
installer container, formatting the disk, and copying the file system into place.
Once that is complete, Talos enters another wait-loop condition, this time to join
the etcd cluster, which currently does not exist. This is shown in a looped
message in the kernel logs, something akin to:
[ 110.511544] [talos] etcd is waiting to join the cluster, if this node is the first node in the cluster, please run `talosctl bootstrap`
So, with the Talos configuration generated earlier I can bootstrap the Talos control plane:
$ talosctl --talosconfig talosconfig --nodes ${TALOS_CONTROL_PLANE} bootstrap
And Talos begins to configure the etcd cluster, as well as the static pods that function as part of the control plane. Once it is all done, a kernel message is logged confirming the boot process is complete and that I now have a functional Talos Kubernetes control plane.
[ 302.315792] [talos] boot sequence: done: 4m17.856857358s
With that, the kubeconfig for the Talos cluster can be retrieved and used by
kubectl.
$ talosctl --talosconfig talosconfig --nodes 192.168.10.101 kubeconfig ./kubeconfig

$ kubectl --kubeconfig ./kubeconfig get nodes
NAME                   STATUS   ROLES                  AGE   VERSION
talos-192-168-10-101   Ready    control-plane,master   28m   v1.23.1
The cluster still isn’t much use, as we only have a single control plane node, which by default won’t allow regular workload pods to be scheduled on it.
Adding Worker Nodes
Adding the remaining nodes to the cluster as workload nodes is very similar to the process for the control plane, but instead applying the configuration file of the worker node at the configuration prompt of the boot process. Since the workers are all cattle, they can be configured at the same time with the same configuration. As with the control plane node, the workers get static IP leases from the DHCP server.
$ export TALOS_WORKER_01="192.168.10.102"

$ export TALOS_WORKER_02="192.168.10.103"

$ talosctl --nodes ${TALOS_WORKER_01} apply-config --insecure --file worker.yaml

$ talosctl --nodes ${TALOS_WORKER_02} apply-config --insecure --file worker.yaml
Once they have gone through the install and boot sequence, they will automatically
join the cluster control plane set up earlier. We can check the node status with
kubectl.
$ kubectl --kubeconfig ./kubeconfig get nodes -o wide
NAME                   STATUS   ROLES                  AGE   VERSION   INTERNAL-IP      EXTERNAL-IP   OS-IMAGE          KERNEL-VERSION   CONTAINER-RUNTIME
talos-192-168-10-101   Ready    control-plane,master   20h   v1.23.1   192.168.10.101   <none>        Talos (v0.14.0)   5.15.6-talos     containerd://1.5.8
talos-192-168-10-102   Ready    <none>                 49s   v1.23.1   192.168.10.102   <none>        Talos (v0.14.0)   5.15.6-talos     containerd://1.5.8
talos-192-168-10-103   Ready    <none>                 31s   v1.23.1   192.168.10.103   <none>        Talos (v0.14.0)   5.15.6-talos     containerd://1.5.8

$  kubectl --kubeconfig ./kubeconfig get pods -A -o wide
NAMESPACE     NAME                                           READY   STATUS    RESTARTS      AGE   IP               NODE                   NOMINATED NODE   READINESS GATES
kube-system   coredns-6f779cf5f6-b7zmc                       1/1     Running   0             20h   10.244.0.3       talos-192-168-10-101   <none>           <none>
kube-system   coredns-6f779cf5f6-kdkmk                       1/1     Running   0             20h   10.244.0.2       talos-192-168-10-101   <none>           <none>
kube-system   kube-apiserver-talos-192-168-10-101            1/1     Running   0             20h   192.168.10.101   talos-192-168-10-101   <none>           <none>
kube-system   kube-controller-manager-talos-192-168-10-101   1/1     Running   2 (20h ago)   20h   192.168.10.101   talos-192-168-10-101   <none>           <none>
kube-system   kube-flannel-9x4tb                             1/1     Running   0             13m   192.168.10.102   talos-192-168-10-102   <none>           <none>
kube-system   kube-flannel-b786x                             1/1     Running   0             13m   192.168.10.103   talos-192-168-10-103   <none>           <none>
kube-system   kube-flannel-x4x9q                             1/1     Running   0             20h   192.168.10.101   talos-192-168-10-101   <none>           <none>
kube-system   kube-proxy-f9dzb                               1/1     Running   0             20h   192.168.10.101   talos-192-168-10-101   <none>           <none>
kube-system   kube-proxy-vff8v                               1/1     Running   0             13m   192.168.10.102   talos-192-168-10-102   <none>           <none>
kube-system   kube-proxy-zd5gq                               1/1     Running   0             13m   192.168.10.103   talos-192-168-10-103   <none>           <none>
kube-system   kube-scheduler-talos-192-168-10-101            1/1     Running   2 (20h ago)   20h   192.168.10.101   talos-192-168-10-101   <none>           <none>
Using the Cluster
To ensure the cluster is working as expected, it would be prudent to apply some sort of test workload to it and observe the results are as expected. I’m going to use the simple Google Kubernetes Bootcamp project for this.
First, set up a simple deployment and service.
$ kubectl --kubeconfig ./kubeconfig create deployment kubernetes-bootcamp --image=gcr.io/google-samples/kubernetes-bootcamp:v1
deployment.apps/kubernetes-bootcamp created

$ kubectl --kubeconfig ./kubeconfig get pods
NAME                                   READY   STATUS    RESTARTS   AGE
kubernetes-bootcamp-65d5b99f84-hpscj   1/1     Running   0          7m25s

$ kubectl --kubeconfig ./kubeconfig expose deployment/kubernetes-bootcamp --port 8080
service/kubernetes-bootcamp exposed
Forward the service locally and make sure the HTTP endpoint works
$ kubectl --kubeconfig ./kubeconfig port-forward svc/kubernetes-bootcamp 8080 &
[2] 11198
Forwarding from 127.0.0.1:8080 -> 8080
Forwarding from [::1]:8080 -> 8080

$ curl localhost:8080
Hello Kubernetes bootcamp! | Running on: kubernetes-bootcamp-65d5b99f84-hpscj | v=1
Scale the deployment up and check the pods are distributed across the worker nodes
$ kubectl --kubeconfig ./kubeconfig scale deployments/kubernetes-bootcamp --replicas=4
deployment.apps/kubernetes-bootcamp scaled

$ kubectl --kubeconfig ./kubeconfig get pods -o wide
NAME                                   READY   STATUS    RESTARTS   AGE   IP           NODE                   NOMINATED NODE   READINESS GATES
kubernetes-bootcamp-65d5b99f84-8njn9   1/1     Running   0          45s   10.244.1.3   talos-192-168-10-102   <none>           <none>
kubernetes-bootcamp-65d5b99f84-bdsgw   1/1     Running   0          45s   10.244.2.3   talos-192-168-10-103   <none>           <none>
kubernetes-bootcamp-65d5b99f84-hpscj   1/1     Running   0          21m   10.244.2.2   talos-192-168-10-103   <none>           <none>
kubernetes-bootcamp-65d5b99f84-rgl6x   1/1     Running   0          45s   10.244.1.2   talos-192-168-10-102   <none>           <none>
It is pretty clear the cluster is working as expected, and is ready for general use.
Clean up
Now there is a working Talos cluster in the home-lab, the default configuration put together here is great for testing and experimentation. If the machines need to be used for anything else, it’s best to restore them to their pre-Talos state with a simple reset.
$ talosctl --nodes ${TALOS_CONTROL_PLANE},${TALOS_WORKER_01},${TALOS_WORKER_02} reset --graceful=false
This will wipe the installation disk of the Talos cluster nodes, including the boot loader, leaving them clean and ready for more testing!